
As part of setting up my Digipeater MB7UCB I have needed to achieve two things. 1, Program a GM340 to the 144.800Mhz but then also be able to connect it to a Raspberry Pi for the controller.
Both of these cables are very easy to make and only require a couple of components each, some wire and and something to mount it all too.
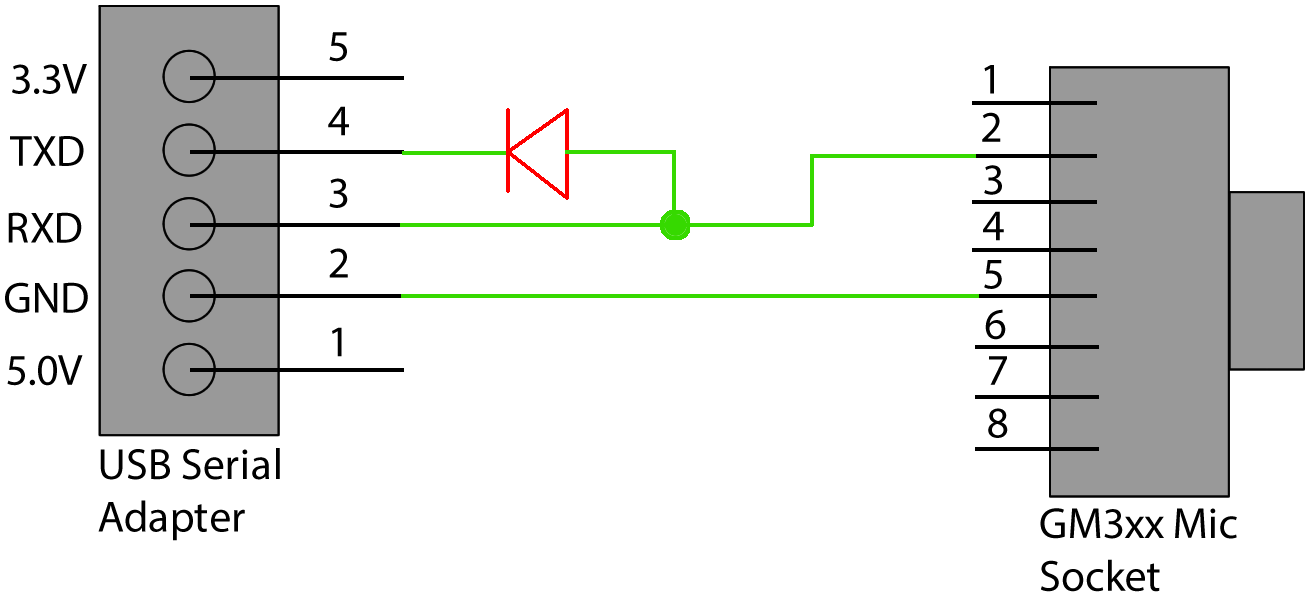
Programing Cable
The programing cable is very simple and only requires 1 component…. a diode, an easily purchased USB Serial TTL adapter like this and a cable terminated on one end with an RJ45 (Network cable). The diode is used to control the direction / path of the signal in and out of the radio this is because the USB adapter has one transmit pin and one receive pin. Whereas the radio uses the same pin in the microphone plug for transmit and receive.


Data Interface Cable
The data interface cable is just as simple to produce. You will require 2x 3.5mm jacks (depending on the audio interface you are using), a 47ohm resistor, a 22 microfarad Capacitor and a 2N2222 or similar transistor.


Please click the images to view an enlarged version.
Some radio models have an 20 pin accessory connector instead of 16. If this is the case then ignore the 4 outer pins.

The Capacitor is just there to block any DC Voltage that may get onto the line and stop it getting into your RPi
For a doner connector into the back of the radio I purchased the repeater cables available on ebay and just cut off one connector and used the wire and connector with this setup. It also allows you to adjust the input volume using the built in trimmer pot.

